Using MLflow
MLflow is a graphical tool for tracking the results of machine learning. PyKEEN integrates MLflow into the pipeline and HPO pipeline.
To use it, you’ll first have to install MLflow with pip install mlflow and run it in the background with mlflow
ui. More information can be found on the MLflow Quickstart. It’ll
be running at http://localhost:5000 by default.
Pipeline Example
This example shows using MLflow with the pykeen.pipeline.pipeline() function. Minimally, the tracking_uri and
experiment_name are required in the result_tracker_kwargs.
from pykeen.pipeline import pipeline

pipeline_result = pipeline(
    model="RotatE",
    dataset="Kinships",
    result_tracker="mlflow",
    result_tracker_kwargs=dict(
        tracking_uri="http://localhost:5000",
        experiment_name="Tutorial Training of RotatE on Kinships",
    ),
)
If you navigate to the MLflow UI at http://localhost:5000, you’ll see the experiment appeared in the left column.
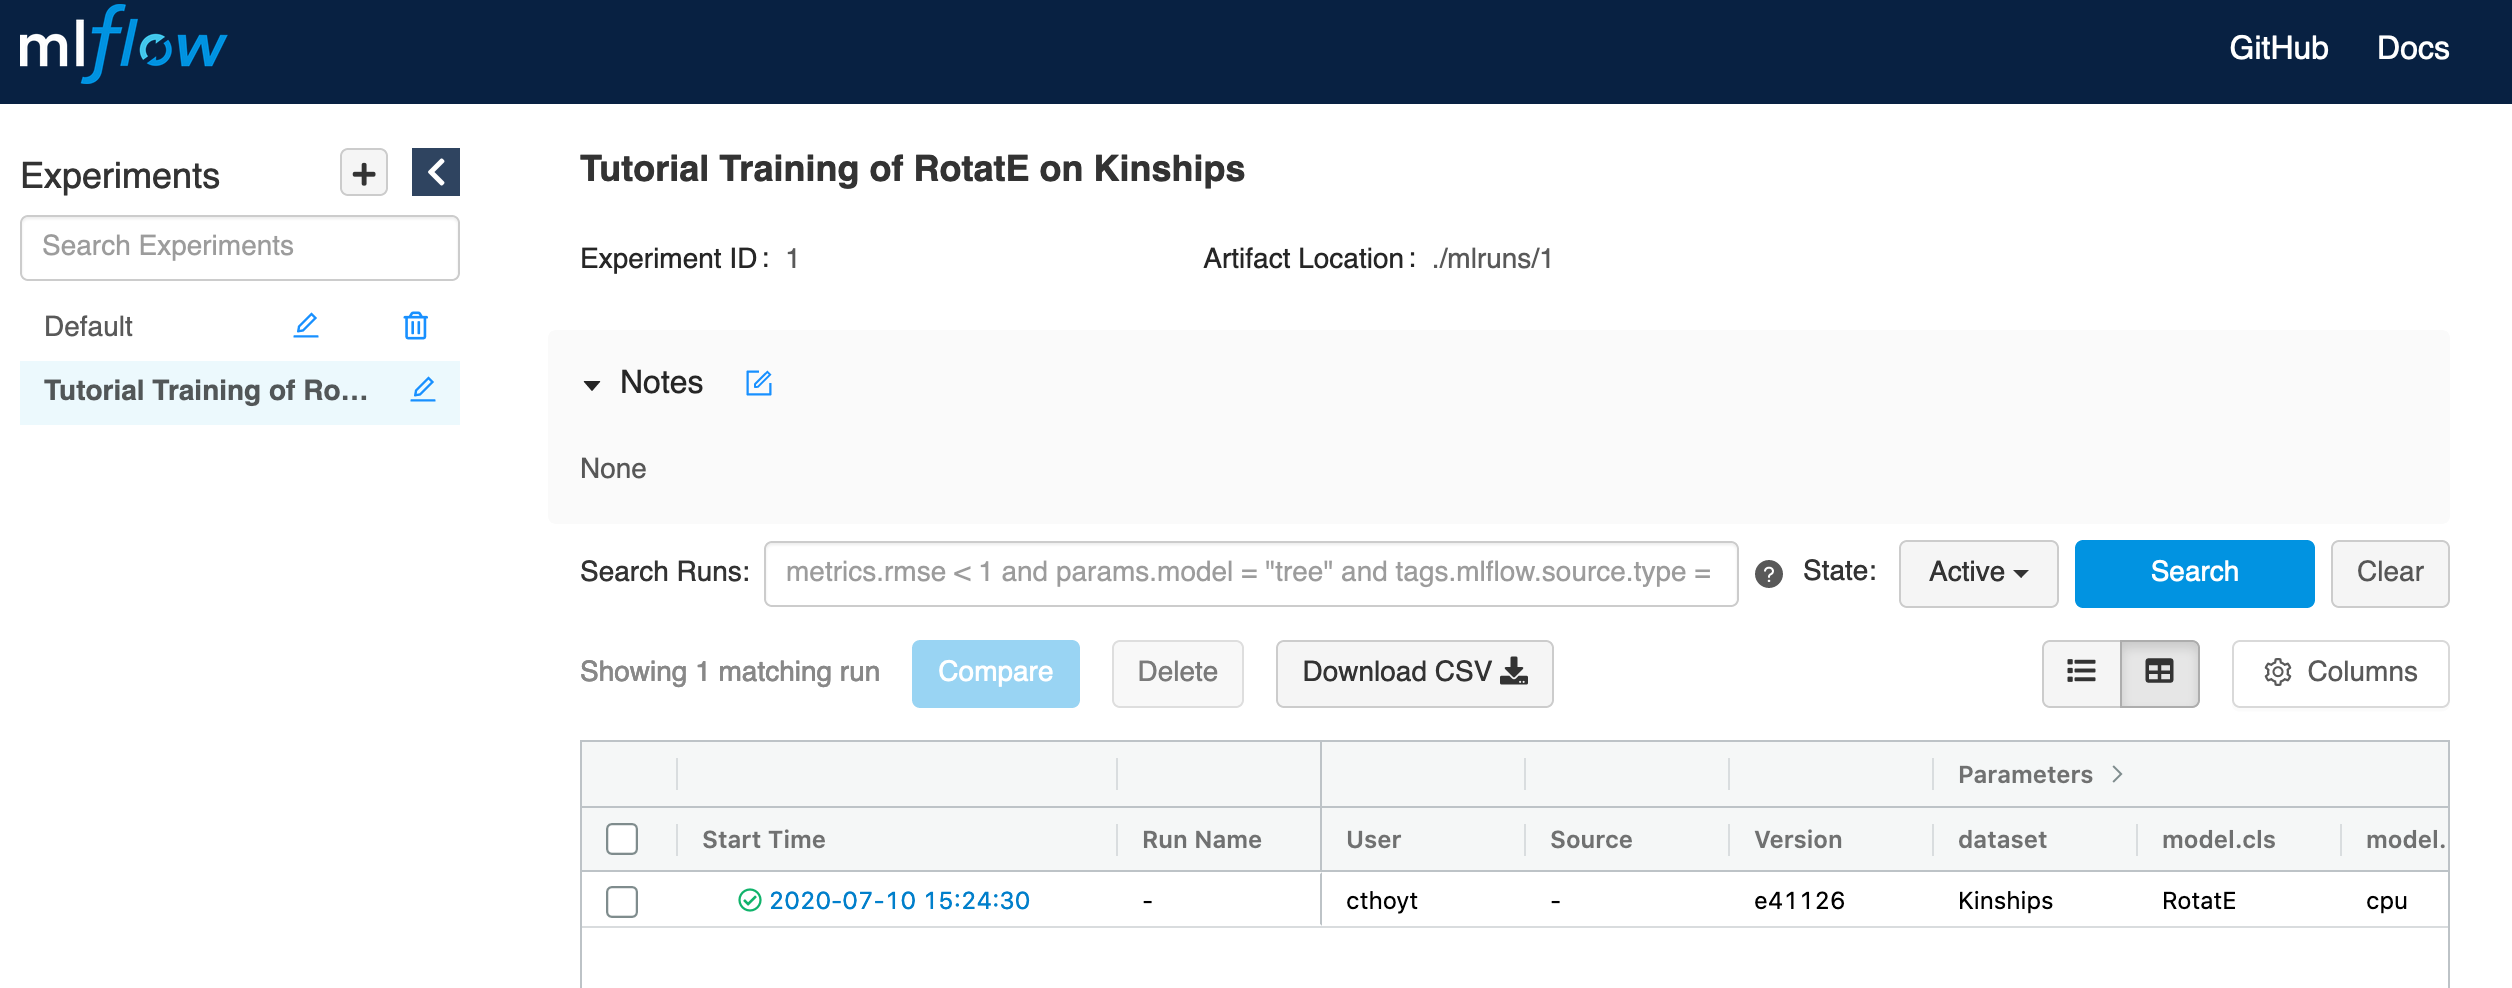
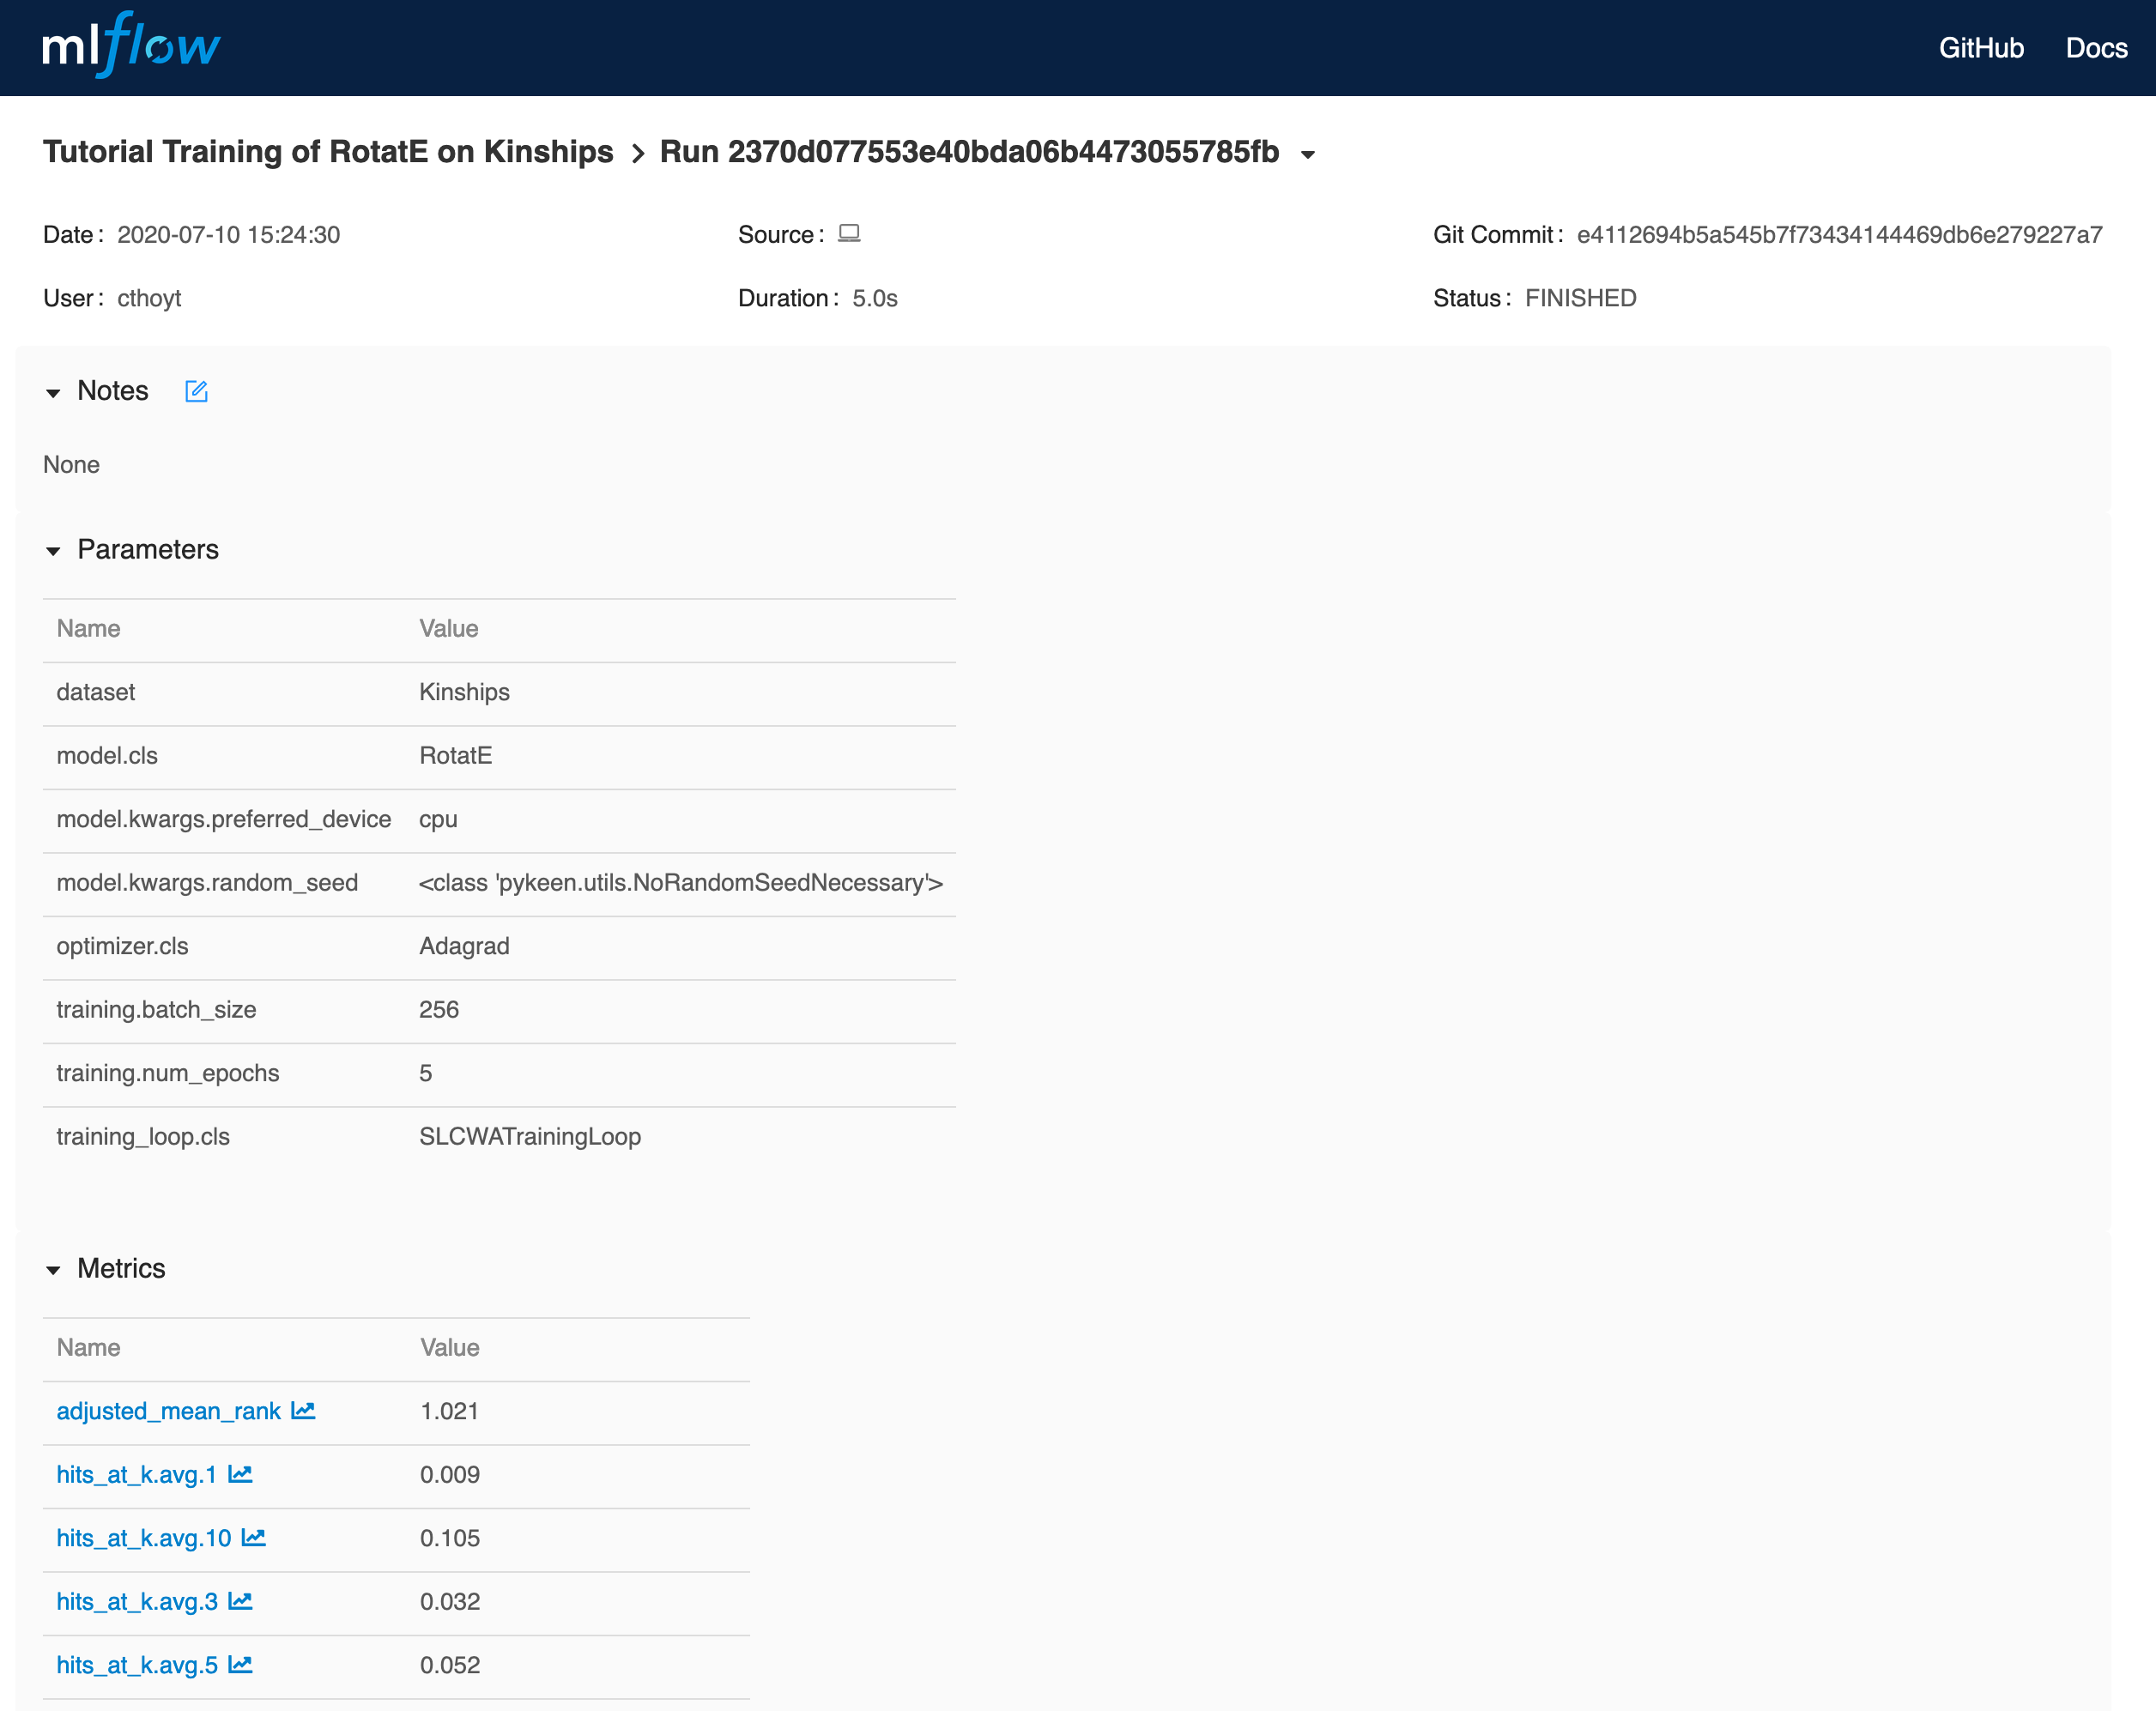
If you click on the experiment, you’ll see this:
HPO Example
This example shows using MLflow with the pykeen.hpo.hpo_pipeline() function.
from pykeen.hpo import hpo_pipeline

pipeline_result = hpo_pipeline(
    model="RotatE",
    dataset="Kinships",
    result_tracker="mlflow",
    result_tracker_kwargs=dict(
        tracking_uri="http://localhost:5000",
        experiment_name="Tutorial HPO Training of RotatE on Kinships",
    ),
)
The same navigation through MLflow can be done for this example.
Reusing Experiments
In the MLflow UI, you’ll see that experiments are assigned an ID. This means you can re-use the same ID to group
different sub-experiments together using the experiment_id keyword argument instead of experiment_name.
from pykeen.pipeline import pipeline

experiment_id = 4  # if doesn't already exist, will throw an error!
pipeline_result = pipeline(
    model='RotatE',
    dataset='Kinships',
    result_tracker='mlflow'
    result_tracker_kwargs=dict(
        tracking_uri='http://localhost:5000',
        experiment_id=4,
    ),
)